TimePilot Vetro
Adding a clock to your system
Follow the instructions for installing and setting up your TimePilot Central software. When you complete the TimePilot Central setup, you can now add your Vetro clocks.
To add a Vetro clock, follow these steps:
- Start TimePilot Central.
- Click the Clock Manager tab.
- Click the "Add New Clock" button near the top of the screen.
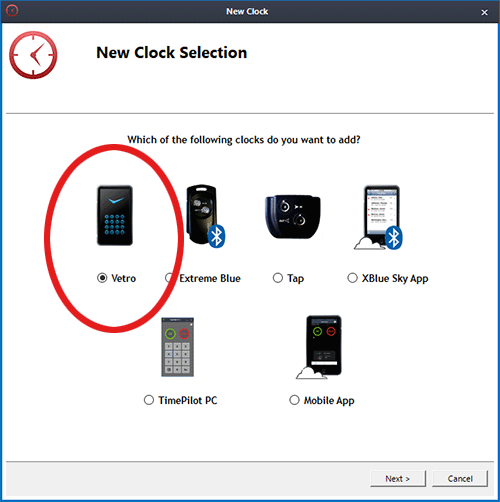
- Select the Vetro clock, click "Next," and follow the instructions on the screen.
- Give the Vetro time clock a name. The name of the clock where employees clocked in or out will appear in TimePilot Central—helpful if you're using more than one Vetro timeclock in your business.
- Set an administrative password on the clock. The factory-set password is 123456, and you'll use that to set the time and date on your clock when you first power it up, but you'll change the password here to a six-digit number unique to your business.
- Select the employees who will be using this clock.
If your Vetro clock is on your network, the changes will be transferred to it automatically. If you're using your clock in Standalone Mode, follow the instructions below:
- The TimePilot software will indicate that changes are waiting to be placed on the USB drive.
- Insert the USB drive into a USB port on your computer. The changes will be transferred to the drive.
- Plug the USB drive into the Vetro clock.
- On the Vetro clock's keypad, enter Administrative Mode by pressing "99" and then "OK," followed by the password you created when you set up your clock in Clock Manager.
- Press 3, which corresponds to "Read USB drive" in the menu. The Vetro clock will read the USB drive contents and record all of the changes.