Getting Started
Using Clock Manager
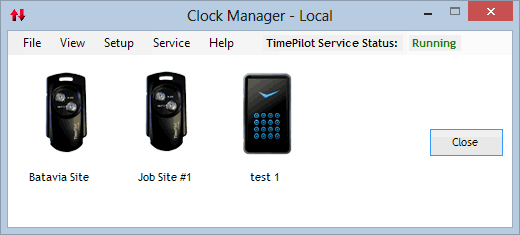
Clock Manager gives you a view of all the clocks on your system and allows you to make a variety of changes to your clocks.
Across the top of the screen are five menus: File, View, Setup, Service and Help. If you have installed the TimePilot Service, you will also be able to see whether the service is running or not. Note: Many of these menu items are also available if you right-click the image of one of your clocks in Clock Manager.
File
Under the File menu are four choices:
- System Settings: There are three tabs on this screen: Cloud Settings, Data Import and Daylight Saving:
- Cloud Settings: This tab is for Professional Edition users who will be using TimePilot's Smartphone App and Enterprise Edition users who will be using Tap, Vetro, Extreme Blue Enhanced or TimePilot PC at a remote location. Remote clocks, including the Apps, send their clock-in and clock-out information to TimePilot Central via "the Cloud." Here you can give this Remote location a name (so transactions that originate here are labeled in TimePilot Central). You can also change the path to the TimePilot Cloud folder.
- Data Import: When employees clock in and out at TimePilot Extreme Blue or at Tap, the clock records their iButton number—not their name. Then, when the clock-in and clock-out information is imported into the TimePilot database, the software matches up the iButton number with the owner's name in the database. But what happens if there is no corresponding name for a clock-in or a clock out? This is where you decide that: If you put a check in the checkbox, the software will automatically delete the clock-in or clock-out; if you leave the box unchecked, the transaction will appear in TimePilot Central and a supervisor can delete it, add a name, etc.
How likely is this to happen? Here are two scenarios: An employee loses his or her iButton and clocks in with another one that hasn't been set up in the software; or two companies at a building site each mount an Extreme Blue clock, and an employee from one company clocks out at the other company's clock by mistake.
- Daylight Saving: If you want your computer or server to automatically handle the twice-a-year change to and from Daylight Saving Time, click the first checkbox; if you want to set the dates on your own, click the second checkbox and enter the dates of the changeovers.
- Locate Data File to Import: If you've been sent clock-in and clock-out data (for instance, a data file was sent to you via e-mail from a supervisor's USB drive), this is how you'll import them into the TimePilot database.
- Initialize USB Drive: This function prepares a USB drive for use with TimePilot Extreme Blue, Extreme Blue Enhanced or Vetro.
- Exit: Closes Clock Manager.
View
You can see your clocks as icons (the default) or in a list.
Setup
Starts the New Clock Wizard, which guides you through the setup of a clock on the system.
You'll see this menu item only if you have installed the TimePilot Service software. If the Service is running, you can stop it here; if it's not running, you can start it here. You can also stop Service from automatically importing data from Remote clocks (click here to learn more about this feature) and see a log that lists when the Service has been started and stopped.
Help
There are three items here:
- Help: Opens these help files.
- Check for Updates: Checks for a newer version of the Clock Manager and, if it finds one, gives you the option to download and install it. (Requires an Internet connection).
- About: Gives you the version and build numbers of the Clock Manager software, as well as the location of your TimePilot software and your TimePilot database.