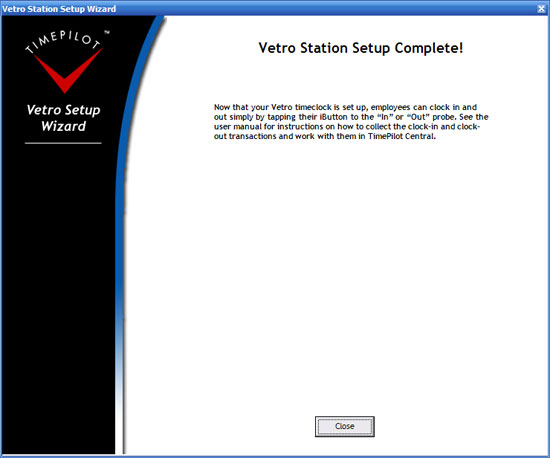
When you complete the TimePilot Central Setup Wizard, you’ll be taken directly to the Vetro Setup Wizard, which will guide you through setting up your clock in the software.
In the Vetro Setup Wizard, you’ll do the following:

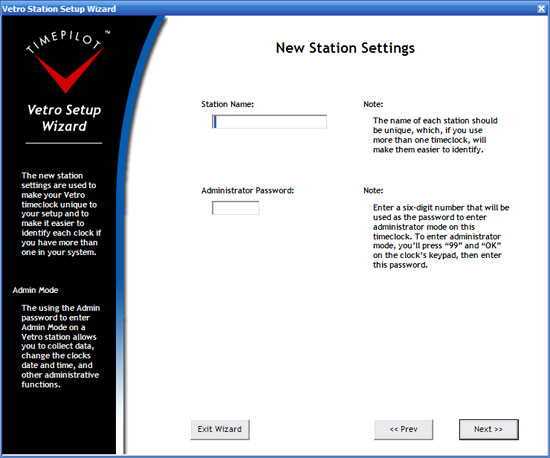
The first thing you'll do is give the clock a name and set your own password to access the Administrative Menu on the clock. The name is important, because if you ever have multiple Vetro clocks on the same system, you'll know where employees clocked in and out. The Vetro clock ships with a factory-set password of 123456. You'll use that password to set the clock when you power it up for the first time, but afterward you'll use the password you set here. Make sure you don't choose 123456 as your new password: if you do so, your employees will be able to change the clock's settings.
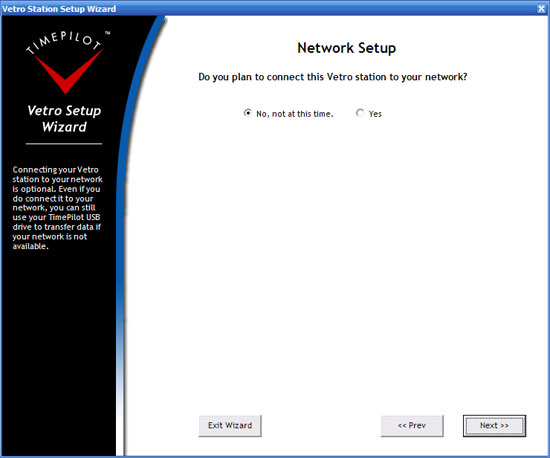
Next, you'll be asked if you'll be connecting the Vetro clock to your network with an Ethernet cable.
If you click "No," that means you'll be using the clock in Standalone Mode. In Standalone Mode, the clock does not need to be cabled to a Local Area Network. Vetro holds employee clock-ins and clock-outs in memory until a supervisor downloads them to the TimePilot USB drive. The supervisor then transfers the data to a PC running the TimePilot software.
If you click "Yes," that means you'll be using the clock in Network Mode. In Network Mode, an Ethernet cable from your server is plugged into the jack at the bottom of the clock, and the clock becomes a part of your network. As long as a small program called Vetro Data Manager is running, the clock automatically sends its clock-in and clock-out information to the TimePilot software. If Vetro Data Manager is not running, the clock-in and clock-out data is held in the clock's memory until the next time the Data Manager software is started, then the data is sent to the TimePilot software. If your network goes down for an extended period of time, you can always collect the data using the USB drive by following the directions for Standalone Mode.
|
If you click "No," you'll see this screen: 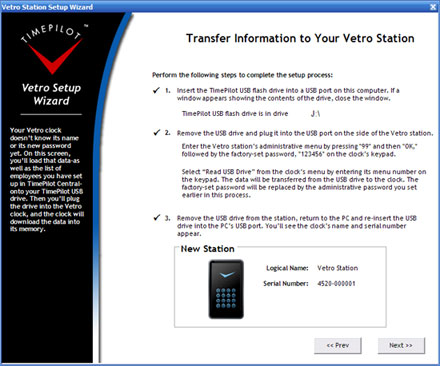
Follow the on-screen instructions to tell the clock its new name and password. You'll do this by saving the information to your TimePilot USB Drive, plugging the drive into your clock and downloading the information into it. Along with the newly created name of the clock and password, the software automatically copies the names of employees and their ID numbers to the drive. They'll also be transferred to the timeclock. After the data is transferred into the clock, you'll bring the USB Drive back to the computer and plug it in again to verify to the TimePilot software that the transfer has been made. When this is complete, an image of the clock and its name and serial number will appear at the bottom of the screen. (Scroll down to the next step) |
|
If you click "Yes," you'll see the Network Setup box appear at the bottom of the screen: 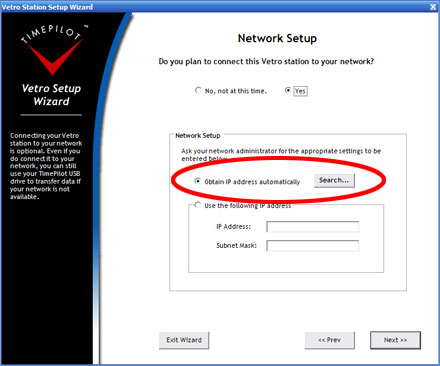 Note: Some advanced users will want to assign their clock a fixed IP address. If so, click the "Use the following IP address" button, enter the requested information and click "Next." You'll be taken to the instructions for transferring your setup information to the USB drive and on to the clock that are shown at left. Most users will want their system to obtain their IP address automatically. If you do, click the appropriate button, then the "Search" button. The screen below will appear. Make sure you've completed steps 1, 2 and 3, then click the "Search for Vetro Clocks" button. 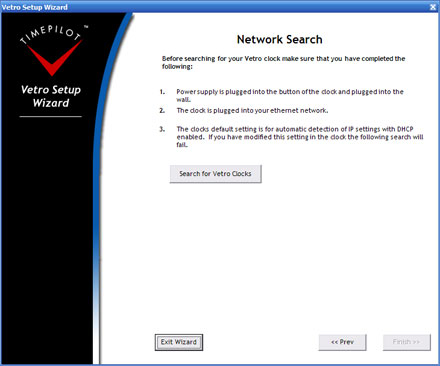
The system will search for the clock. When it finds it, the clock's image, name and serial number will appear. (see below) 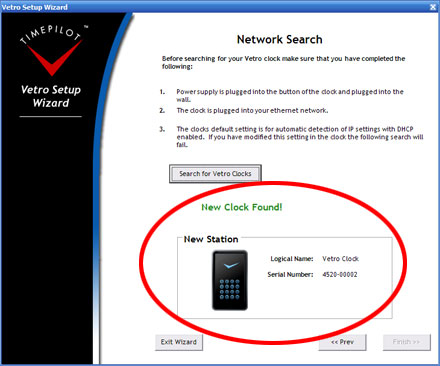
(Continue with the steps below.) |
The next step is assigning iButtons to your employees. If you're just going to have employees clock in with their ID numbers, you can skip this section and your setup is complete. We don't recommend that, however; in fact, for the greatest security we strongly recommend using iButtons. If you’re using only ID numbers, it’s easy for one worker to clock in another; all they need is their co-worker’s number. Because iButtons are usually kept on an employee’s keychain, it’s much less likely that an employee will loan another their keys to clock them in.
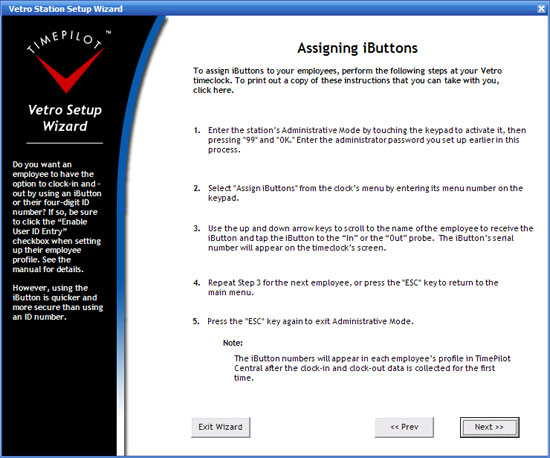
After your iButtons are set up, you can distribute them to your employees and they can start using the system. For instructions on how to clock in and clock out, click here.
