Getting Started
The TimePilot Central Setup Wizard
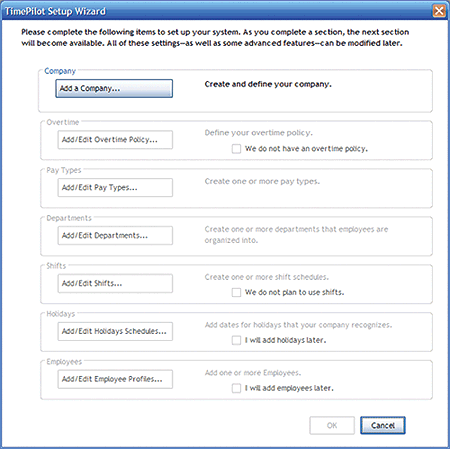
After you set up your database, you'll be taken to the TimePilot Central Setup Wizard, which guides the first-time user step-by-step through the process of setting up the system. Simply follow the steps, and when you complete a task,
the next task will become available.

The seven-step process includes:
- Add a Company: Here's where you'll enter your company information, including
name, your pay cycle (weekly, bi-weekly, etc.), whether you want to have
rounding applied to your employees, etc. If your business has more than one pay
cycle, you can create multiple Companies with different settings.
Details...
- Add/Edit Overtime Policy: Do you pay overtime to your
employees? Each Company can have multiple overtime policies, each with a different
set of criteria and payment rates. Details...
- Add/Edit Pay Types: This is where you'll set up how your
employees will be treated in terms of whether they get overtime, vacation
pay, holiday pay, etc. You can have multiple pay types; for instance, one
for salaried employees and another for hourly employees. Details...
- Add/Edit Departments: You'll enter your company's departments
here. Later, when you're using the system, you can generate reports grouped
by the departments you enter here. Details...
- Add/Edit Shifts: This is where you create your employees' shifts.
The system uses shift schedules to determine if an employee is early or
late. Details...
- Add/Edit Holiday Schedules: You'll set up your company holiday schedule here. You can have more than one
schedule. Details...
- Add/Edit Employee Profiles: You'll add your employees here.
Details...
