TimePilot Definitions
Holidays
What's a holiday schedule?
The holiday schedule is a list of holidays recognized by your
organization.
The list is used by the TimePilot software when employees are paid for
holidays or if they are eligible for overtime pay when they work a
scheduled holiday. The software allows organizations to have multiple holiday schedules for various groups of employees.

You'll create your holiday schedule in the
Setup Wizard, which appears the
first time you start your TimePilot software. When you set up employees, you'll
assign a holiday schedule to each employee. You can edit your holiday schedule
details or add or delete a holiday schedule by clicking on TimePilot Central's Setup
Menu and choosing "Holiday Setup... ."
To edit or delete a schedule, click on the name of the schedule and then the
appropriate button. To create a schedule, click the "Add a Holiday Schedule"
button.
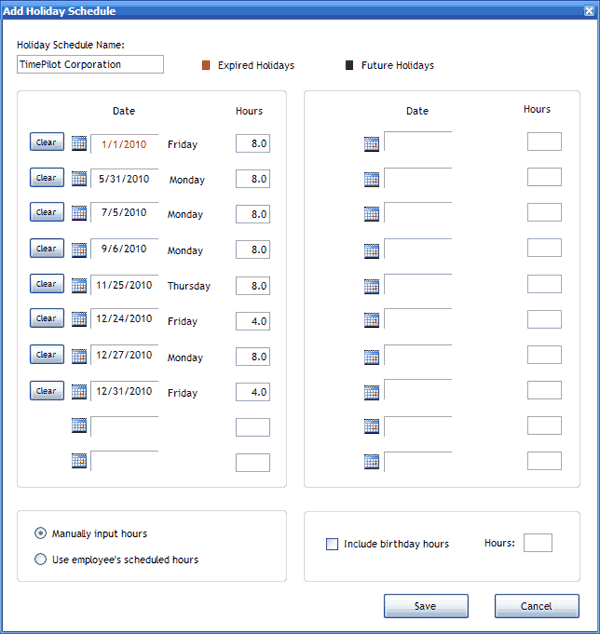
Either way, here's how to create a holiday schedule:
- Give the schedule a name (for example: "Hourly holiday schedule").
- Click the calendar icon (
 )next
to the first holiday field. A calendar will pop up. Click on the date of
your first holiday, then click "OK" to enter the date in the field.
- If you want to enter the number of hours of holiday time the employee
will receive, do so in the box to the right of the holiday date.
If you want to have the software look up the employee's schedule and issue
the number of holiday hours automatically based on the , click the button
next to "Use employee's scheduled hours" at the bottom of the box. If you do
so, the "Hours" column will disappear.
- Continue in the same manner in the next fields until you've entered all
of your holidays.
- Does an employee get his or her birthday off as a holiday? If so, click
the checkbox next to "Include birthday hours" and insert a number of hours
in the field to the right at the bottom right of box. If you want to use
this feature, you must enter the employee's date of birth on the "Optional"
tab in the employee's profile.
- When you're done, click "Save."
