In many cases, the iButtons you receive from TimePilot will not have their 12-character serial numbers engraved on them. We've never recommended that you read the number from the iButton to assign it to the employee; there are much easier ways to do it—and save your eyesight! The instructions appear on the Quick Start Guide you received with your system, but here's a recap:
TimePilot Extreme Blue Enhanced
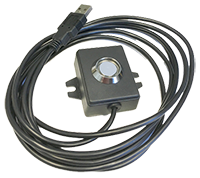 We include an iButton Reader (shown at right) in your package for just this purpose.
- Plug the reader into a USB port in your computer. The device will be recognized by Windows.
- Now set up your employee in the TimePilot software. On the "Add a Profile" screen, when you're asked for the employee's iButton number, click the “Get iButton Number” button.
- Then simply press the iButton into either one of the blue probes on the iButton Receptor. The device will read the number from the iButton and enter it in the software.
- When you're done, transfer the employee profile to the smartphone(s) running the TimePilot app. For more information, see the Extreme Blue Enhanced Quick Start Guide.
TimePilot Extreme Blue
 With this product, everything is done at the Extreme Blue clock.
- Start the TimePilot App on your smartphone.
- To add an employee, tap the "+" at the top right of the screen and fill in the information requested.
To change an employee's iButton, open their profile by pressing and holding their name on the screen and choosing "Edit" from the menu that pops up.
- Follow the on-screen instructions to assign an iButton.
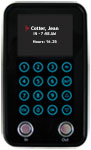
TimePilot Vetro
Standalone mode:
- First, set up the employee in the TimePilot software. Don't bother entering an iButton number; you'll do this at the clock.
- At the Vetro clock, enter Administrative Mode by pressing “99” followed by “OK” on the keypad. When prompted, enter the administrator password.
- Select "Assign iButtons" from the clock’s menu by entering its menu number (4) on the keypad.
- Use the up and down arrow keys to scroll to the name of the employee who will be assigned the iButton and tap the iButton to the "In" or the "Out" probe. The iButton’s serial number will appear on the timeclock’s screen.
- Repeat Step 4 for the next employee.
Now you'll load your employee data from the clock onto the USB drive and transfer it back to the TimePilot software, so both the clock and the software have exactly the same data.
- Press "OK" to return to the Administration menu on the clock.
- Select "Collect Data" from the menu that appears on the clock’s screen by entering its menu number (1) on the keypad. The data will be transferred from the clock to the USB drive.
- When the process is complete, remove the USB drive.
- Press ESC to return to the Administration menu, then press ESC a second time to exit Administrative Mode.
- Plug the USB drive into your computer running Clock Manager. The data will transfer into the software and your clock and software will be synchronized.
Network Mode
- First, set up the employee in the TimePilot software. Don't bother entering an iButton number; you'll do this at the clock.
- Click Save and return to the TimePilot Central main screen.
- Start Clock Manager (Setup > Clock Manager). Right-click the first clock you want to change, choose "Network Functions" and "Transfer User Setup to Clock."
- Follow the instructions in the box that pops up to transfer the changes via Clock Manager.
- Repeat Steps 2 and 3 for each Vetro clock you want changed.
- On the Vetro clock’s keypad, enter Administrative Mode by pressing "99" and then "OK," followed by your Vetro password.
- Select "Assign iButtons" from the clock’s menu by entering its menu number (4) on the keypad.
- Use the up and down arrow keys to scroll to the name of the employee to receive the iButton and tap the iButton to the "In" or the "Out" probe. The iButton’s serial number will appear on the timeclock’s screen.
- Repeat Step 10 for the next employee, or press the "ESC" key to return to the Administrative Menu and ESC again to exit Administrative Mode.
Note: iButton serial numbers will appear in each employee’s profile in TimePilot Central after the clock-in and clock-out data is collected for the first time.
TimePilot Tap+

- First, use the included USB cable to connect the Tap clock to your PC.
- Set up the employee in the TimePilot software. Don't bother entering an iButton number; you'll do this in the next step.
- Click the blue “Get iButton Number” on the employee profile screen and touch the iButton to either of the probes on the Tap clock and the number will be entered automatically.
- Save the profile and repeat Steps 2 and 3 for the next employee, if necessary.

